





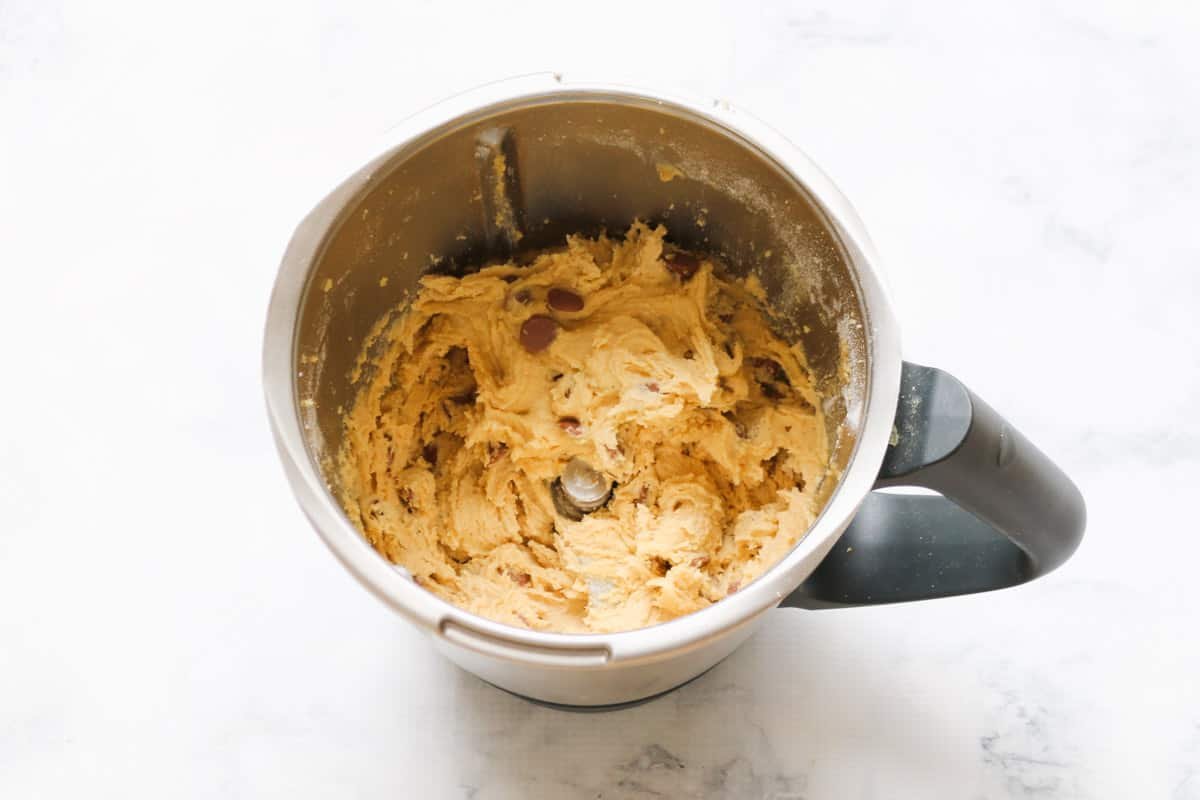
Thermomix Chocolate Chip Cookies are one of the world’s most beloved homemade treats, and making them in a Thermomix simplifies the process while delivering consistently delicious results. The Thermomix handles mixing with precision, ensuring the butter, sugar, eggs, and dry ingredients combine evenly without overworking the dough. The result is soft, chewy cookies with crisp golden edges and pockets of melted chocolate in every bite.
Whether you’re baking for family, friends, holiday celebrations, or simply satisfying a sweet craving, this Thermomix chocolate chip cookie recipe is easy to follow and produces bakery-style cookies every time. Using common pantry ingredients and a few simple techniques, you can create cookies that are rich, buttery, and packed with chocolate flavor.
This comprehensive guide covers everything from ingredient selection to baking tips, storage methods, flavor variations, and troubleshooting so that even beginners can achieve perfect cookies.
Why You’ll Love This Recipe
- Easy to prepare using a Thermomix
- Soft centers with crispy golden edges
- Rich buttery flavor
- Loaded with chocolate chips
- No hand mixer required
- Great for beginners
- Perfect for freezing
- Ideal for lunchboxes, parties, and holidays
Ingredients
Makes approximately 24 cookies
Wet Ingredients
- 125 g unsalted butter, softened
- 100 g caster sugar
- 100 g light brown sugar
- 1 large egg
- 1 teaspoon vanilla extract
Dry Ingredients
- 250 g plain (all-purpose) flour
- 1 teaspoon baking soda
- ½ teaspoon baking powder
- ½ teaspoon fine salt
Mix-Ins
- 200 g milk chocolate chips
- 50 g dark chocolate chunks (optional)
- 50 g chopped walnuts or pecans (optional)
Equipment
- Thermomix (TM5, TM6, or TM31)
- Baking trays
- Baking paper
- Cooling rack
- Cookie scoop or tablespoon
Preparing the Ingredients
Allow the butter to soften at room temperature for about 30 minutes. Soft butter mixes more easily and creates a smoother cookie dough.
Measure all ingredients before starting. Preparing everything in advance helps ensure the mixing process goes smoothly.
Preheat your oven to 180°C (350°F) for conventional ovens or 160°C (320°F) for fan-forced ovens.
Line two baking trays with baking paper.
Step 1: Mix the Butter and Sugars
Place the softened butter, caster sugar, and brown sugar into the Thermomix bowl.
Mix for 20 seconds on Speed 4 until light and creamy.
Scrape down the sides of the bowl with the spatula.
Creaming the butter and sugar helps incorporate air, producing cookies with a tender texture.
Step 2: Add the Egg and Vanilla
Add:
- Egg
- Vanilla extract
Mix for 15 seconds on Speed 4.
The mixture should become smooth and creamy.
Step 3: Add the Dry Ingredients
Add:
- Plain flour
- Baking soda
- Baking powder
- Salt
Mix for 20–25 seconds on Speed 4 until a soft dough forms.
Avoid overmixing, as this can make the cookies tougher.
Scrape down the bowl if needed and mix for another few seconds if any dry flour remains.
Step 4: Add the Chocolate Chips
Add the chocolate chips and optional chocolate chunks or chopped nuts.
Use Reverse Mode, Speed 2, for 10–15 seconds until evenly distributed.
Using Reverse Mode prevents the chocolate chips from breaking apart.
Step 5: Chill the Dough
Although optional, chilling the dough for 30 minutes improves flavor and helps prevent excessive spreading during baking.
Cover the dough and refrigerate.
If you’re short on time, you can bake immediately, but the cookies may spread a little more.
Step 6: Shape the Cookies
Using a cookie scoop or tablespoon, scoop portions of dough about 2 tablespoons each.
Roll gently into balls.
Place them on the prepared baking trays about 5 cm (2 inches) apart.
Leave enough space because the cookies expand while baking.
Step 7: Bake
Bake in the preheated oven for 10–12 minutes.
The edges should be lightly golden while the centers still look slightly soft.
Do not overbake.
The cookies continue to cook on the baking tray after they leave the oven.
Step 8: Cool
Leave the cookies on the baking tray for 5 minutes.
Transfer them carefully to a cooling rack.
Cooling allows the cookies to firm up while remaining soft in the center.
Serving Suggestions
Serve the cookies warm or at room temperature with:
- Cold milk
- Hot coffee
- Tea
- Hot chocolate
- Vanilla ice cream
They also make delicious ice cream sandwiches or dessert platters.
Expert Tips
Use Room-Temperature Butter
Soft butter creams better than cold butter.
Measure Flour Correctly
Too much flour creates dry cookies.
Use a kitchen scale for accuracy.
Don’t Overmix
Mix only until the ingredients are combined.
Overmixing develops gluten and creates firmer cookies.
Chill the Dough
Cold dough spreads less and develops deeper flavor.
Bake One Tray at a Time
This promotes even baking and consistent browning.
Flavor Variations
Double Chocolate Cookies
Replace 40 g of flour with cocoa powder.
Use both milk and dark chocolate chips.
White Chocolate Macadamia
Replace milk chocolate chips with white chocolate chips.
Add chopped macadamia nuts.
Salted Caramel
Mix caramel pieces into the dough.
Sprinkle flaky sea salt over the cookies immediately after baking.
Peanut Butter Chocolate Chip
Add 2 tablespoons of peanut butter to the wet ingredients.
Use peanut butter chips along with chocolate chips.
Oatmeal Chocolate Chip
Replace 50 g of flour with rolled oats.
The cookies become heartier and chewier.
Orange Chocolate
Add the finely grated zest of one orange.
Orange and chocolate create a wonderful flavor combination.
Storage
Store cooled cookies in an airtight container.
They remain fresh for up to 5 days at room temperature.
To keep them extra soft, place a slice of bread inside the container. The bread helps maintain moisture without affecting the cookie flavor.
Freezing Instructions
Freeze the Dough
Roll the dough into balls.
Freeze on a tray until solid.
Transfer to freezer bags.
Store for up to 3 months.
Bake directly from frozen, adding 2–3 extra minutes to the baking time.
Freeze Baked Cookies
Cool completely.
Store in freezer-safe containers or bags.
Freeze for up to 3 months.
Thaw at room temperature before serving.
Troubleshooting
Cookies Spread Too Much
Possible causes:
- Butter too soft
- Dough not chilled
- Oven not fully preheated
Cookies Too Dry
Possible causes:
- Too much flour
- Overbaking
- Overmixing
Cookies Too Hard
Reduce baking time by 1–2 minutes.
The cookies should still look slightly underdone when removed from the oven.
Chocolate Chips Sink
Ensure the dough is thick enough.
Chilling the dough usually solves this problem.
Nutrition (Approximate Per Cookie)
Based on 24 cookies.
- Calories: 165
- Protein: 2 g
- Carbohydrates: 21 g
- Fat: 8 g
- Saturated Fat: 5 g
- Fiber: 1 g
- Sugar: 12 g
- Sodium: 90 mg
Values vary depending on the type and quantity of chocolate and optional nuts used.
Frequently Asked Questions
Can I use salted butter?
Yes. If using salted butter, reduce the added salt to about ¼ teaspoon.
Can I substitute dark chocolate for milk chocolate?
Absolutely. Dark, milk, white, or a combination of chocolates all work well.
Can I make these cookies gluten-free?
Yes. Replace the plain flour with a good-quality gluten-free all-purpose flour blend designed for baking.
Can I add nuts?
Yes. Chopped walnuts, pecans, hazelnuts, or macadamias add extra crunch and flavor.
Do I need to chill the dough?
No, but chilling is highly recommended for thicker cookies with better flavor and less spreading.
Conclusion
These Thermomix chocolate chip cookies are the perfect combination of convenience and homemade goodness. With the Thermomix handling the mixing, the recipe comes together quickly while producing a smooth, evenly blended dough every time. The cookies bake into golden treats with crisp edges, soft and chewy centers, and generous pockets of melted chocolate that make every bite irresistible. Whether you’re preparing them for afternoon tea, school lunchboxes, festive gatherings, or simply to enjoy with a glass of milk, this recipe is reliable, versatile, and easy to customize with your favorite mix-ins. Once you’ve mastered the basic method, you ca
