



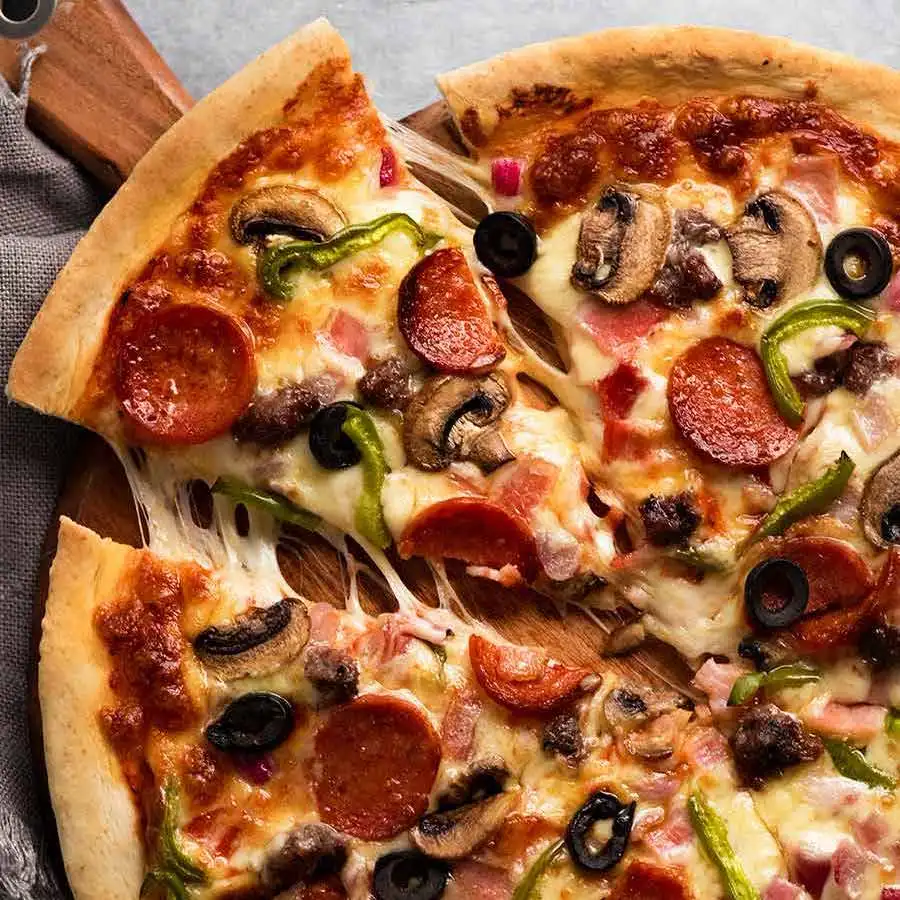
Gluten Free Pizza Crust: Making a delicious gluten-free pizza crust at home is easier than many people think. The key is using the right blend of gluten-free flours, adding a binder such as psyllium husk or xanthan gum, and allowing the dough enough time to hydrate. Unlike traditional wheat dough, gluten-free dough behaves more like a thick batter or soft bread dough, so it requires a slightly different approach. The result can be a crust that is crisp on the outside, soft and chewy on the inside, and sturdy enough to hold your favorite toppings.
Why Make Gluten-Free Pizza?
People choose gluten-free pizza for various reasons. Those with celiac disease or gluten sensitivity need to avoid gluten completely, while others simply enjoy experimenting with different grains. Homemade gluten-free pizza offers several advantages over store-bought versions. You control the ingredients, avoid unnecessary preservatives, adjust the flavor to your liking, and often save money.
Ingredients
Dry Ingredients
- 2½ cups (300 g) gluten-free all-purpose flour blend (preferably one containing rice flour, potato starch, and tapioca starch)
- 2 teaspoons xanthan gum (omit if your flour blend already contains it)
- 1 tablespoon psyllium husk powder (recommended for better texture)
- 2¼ teaspoons instant yeast (1 packet)
- 1 teaspoon sugar or honey
- 1 teaspoon salt
- 1 teaspoon garlic powder (optional)
- ½ teaspoon dried oregano (optional)
Wet Ingredients
- 1 cup (240 ml) warm water (about 105–110°F or 40–43°C)
- 2 tablespoons olive oil
- 1 teaspoon apple cider vinegar
Equipment Needed
- Large mixing bowl
- Measuring cups and spoons
- Wooden spoon or stand mixer
- Pizza pan or baking stone
- Parchment paper
- Plastic wrap or clean kitchen towel
Step 1: Activate the Yeast
Although instant yeast can be mixed directly into dry ingredients, activating it first ensures it’s working properly.
- Pour warm water into a bowl.
- Stir in the sugar.
- Sprinkle yeast over the water.
- Let it sit for 5–10 minutes.
The mixture should become foamy. If it doesn’t, the yeast may be inactive and should be replaced.
Step 2: Mix the Dry Ingredients
In a large bowl, whisk together:
- Gluten-free flour
- Xanthan gum
- Psyllium husk
- Salt
- Garlic powder
- Oregano
Mix thoroughly so the ingredients are evenly distributed.
Step 3: Combine Wet and Dry Ingredients
Add the following to the dry ingredients:
- Activated yeast mixture
- Olive oil
- Apple cider vinegar
Mix with a spoon or mixer for about 3–5 minutes.
The dough should be soft, sticky, and thicker than cake batter but softer than traditional bread dough. If it appears too dry, add water one tablespoon at a time. If it’s overly wet, sprinkle in a little extra gluten-free flour.
Step 4: Let the Dough Rise
Cover the bowl with plastic wrap or a clean towel.
Allow the dough to rise in a warm place for 30–45 minutes.
Unlike wheat dough, gluten-free dough won’t double dramatically, but it should puff up noticeably.
Step 5: Prepare the Crust
Preheat your oven to 450°F (230°C).
If using a pizza stone, place it in the oven while preheating.
Line a pizza pan with parchment paper and lightly grease it.
Transfer the dough onto the parchment.
Wet your hands with water or lightly oil them.
Gently press the dough outward until it forms a circle about 12 inches (30 cm) across.
Aim for a thickness of approximately ¼ inch (6 mm).
Build up the edges slightly to create a crust.
Step 6: Pre-Bake the Crust
Pre-baking prevents a soggy center.
Bake the plain crust for 10–12 minutes until it begins turning lightly golden.
Remove from the oven.
Step 7: Add Toppings
Spread pizza sauce evenly over the crust.
Add shredded mozzarella cheese.
Top with your favorite ingredients such as:
- Mushrooms
- Bell peppers
- Onions
- Black olives
- Pepperoni
- Cooked chicken
- Spinach
- Tomatoes
- Fresh basil
Avoid using excessive sauce or watery vegetables, as they can soften the crust.
Step 8: Bake Again
Return the topped pizza to the oven.
Bake for 12–15 minutes until:
- Cheese is bubbling.
- Crust edges are golden brown.
- Bottom is crisp.
For extra browning, broil for 1–2 minutes while watching carefully.
Step 9: Cool Before Slicing
Allow the pizza to rest for about 5 minutes before cutting.
This helps the cheese set and makes slicing easier.
Tips for Success
- Use a quality gluten-free flour blend rather than a single flour.
- Psyllium husk creates a chewy texture similar to wheat dough.
- Don’t skip the pre-bake.
- Keep the dough sticky; adding too much flour can make the crust dry.
- Bake on a preheated pizza stone for a crispier bottom.
- Olive oil contributes both flavor and tenderness.
- Fresh yeast produces the best rise.
Flavor Variations
Herb Crust
Add:
- 1 teaspoon Italian seasoning
- ½ teaspoon rosemary
- ½ teaspoon thyme
Garlic Parmesan Crust
Brush the baked crust with:
- Melted butter
- Minced garlic
- Grated Parmesan cheese
Spicy Crust
Mix into the dough:
- ½ teaspoon chili flakes
- ½ teaspoon smoked paprika
Storage
Refrigerator
Store leftover dough in an airtight container for up to 2 days.
Freezer
Wrap the pre-baked crust tightly and freeze for up to 3 months.
Bake directly from frozen by adding a few extra minutes to the cooking time.
Nutritional Information (Approximate Per Slice, 8 Slices)
- Calories: 190
- Protein: 4 g
- Fat: 5 g
- Carbohydrates: 33 g
- Fiber: 2–3 g
- Sugar: 1 g
Values vary depending on the flour blend and toppings used.
Common Mistakes to Avoid
- Using water that is too hot, which can kill the yeast.
- Skipping xanthan gum or psyllium husk if your flour blend lacks binders.
- Overloading the pizza with toppings.
- Baking only once without pre-baking the crust.
- Not allowing the dough to hydrate before shaping.
Final Thoughts
A homemade gluten-free pizza crust can be every bit as satisfying as a traditional one when prepared with the right ingredients and technique. This recipe produces a flavorful crust with a crisp exterior, a tender interior, and enough structure to support generous toppings. Once you’ve mastered the basic dough, you can customize it with herbs, spices, cheeses, or alternative toppings to suit your taste. Whether you’re preparing pizza for someone with celiac disease, gluten sensitivity, or simply exploring gluten-free cooking, this crust offers a dependable foundation for delicious homemade pizzas. With practice, you’ll find that making gluten-free pizza becomes an enjoyable routine, and you’ll be able to experiment with different flour blends and flavors to create a signature crust that’s perfect for family dinners, parties, or weeknight meals.
