



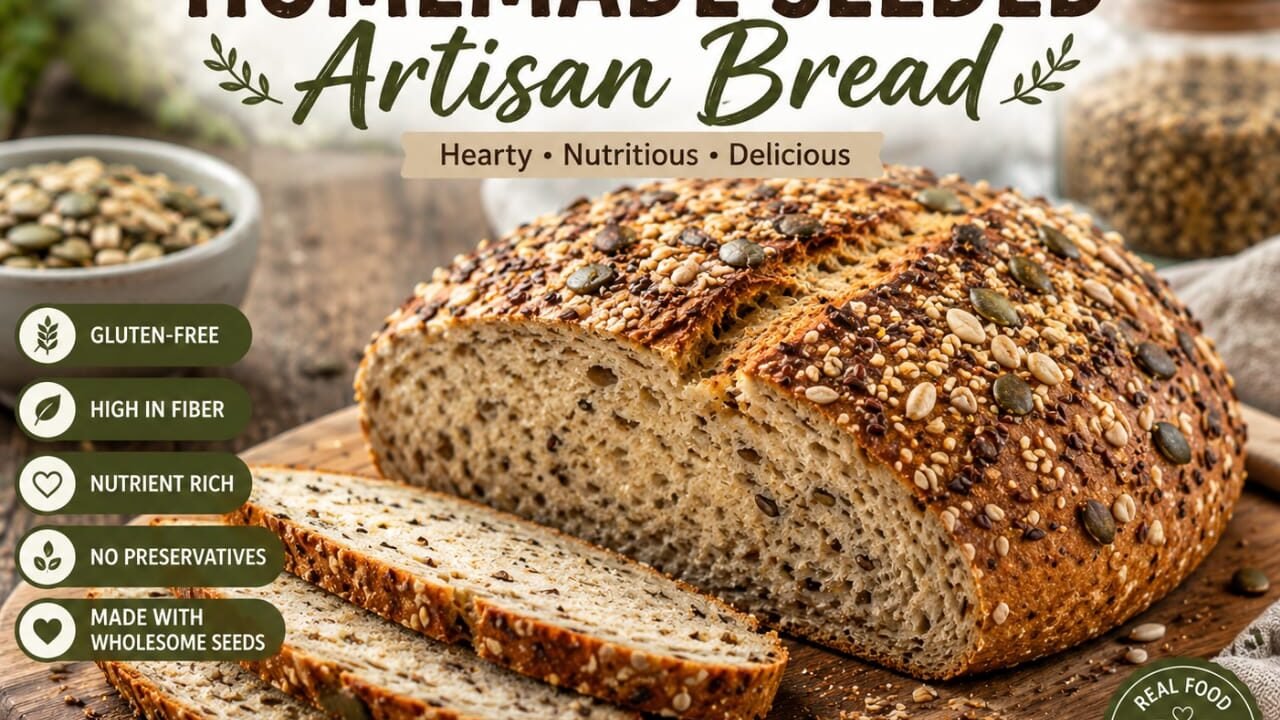

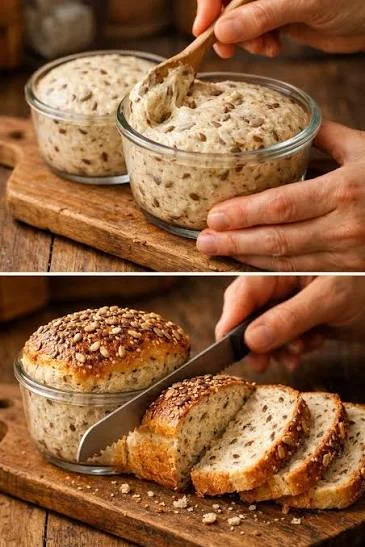
This homemade seeded bread is perfect for breakfast, sandwiches, toast, or serving alongside soups, salads, and hearty meals. The combination of seeds adds a wonderful crunch, while the long fermentation process creates a flavorful loaf with a tender crumb. Making bread at home may seem intimidating, but this recipe uses simple techniques that even beginners can follow.
Why You’ll Love This Seeded Artisan Bread
There are many reasons to try this homemade bread recipe:
- It creates a bakery-style loaf at home.
- The crust is crispy and golden.
- The inside is soft, chewy, and full of flavor.
- Seeds add nutrition, texture, and a nutty taste.
- The dough requires minimal handling.
- It can be customized with your favorite grains and toppings.
Unlike store-bought bread, homemade seeded bread allows you to control the ingredients and avoid unnecessary additives. The aroma of freshly baked bread filling your kitchen is an added bonus.
Ingredients
For the Bread Dough
- 3 cups bread flour or all-purpose flour
- 1 cup whole wheat flour
- 2 teaspoons instant yeast
- 2 teaspoons salt
- 1 tablespoon honey or maple syrup
- 2 tablespoons olive oil
- 1¾ cups warm water (approximately 105–110°F / 40–43°C)
Seed Mixture
Use a combination of:
- 3 tablespoons sunflower seeds
- 3 tablespoons pumpkin seeds
- 2 tablespoons sesame seeds
- 2 tablespoons flax seeds
- 1 tablespoon chia seeds
- 1 tablespoon poppy seeds
For the Topping
- 1 tablespoon milk or egg wash
- 3 tablespoons mixed seeds
Equipment Needed
- Large mixing bowl
- Wooden spoon or dough scraper
- Kitchen towel or plastic wrap
- Loaf pan or Dutch oven
- Baking parchment
- Cooling rack
- Sharp bread knife
Step 1: Prepare the Seed Mixture
Begin by preparing your seeds.
Combine sunflower seeds, pumpkin seeds, sesame seeds, flax seeds, chia seeds, and poppy seeds in a bowl.
You can lightly toast the seeds before adding them to the dough. Toasting enhances their natural oils and gives the bread a deeper nutty flavor.
To toast:
- Heat a dry skillet over medium heat.
- Add the seeds.
- Stir constantly for 2–3 minutes until fragrant.
- Allow them to cool completely.
Reserve some seeds for topping the loaf before baking.
Step 2: Activate the Yeast
If using active dry yeast instead of instant yeast, mix the warm water with yeast and honey.
Allow it to sit for 5–10 minutes until slightly foamy.
This shows that the yeast is active and ready to help the dough rise.
If using instant yeast, you can mix it directly with the flour.
Step 3: Mix the Dough
In a large bowl, combine:
- Bread flour
- Whole wheat flour
- Salt
- Yeast
Add the warm water, honey, and olive oil.
Mix using a wooden spoon until a rough dough forms.
The dough will appear slightly sticky. This is normal and helps create a soft, airy bread.
Add the seed mixture and gently fold until evenly distributed.
Do not worry if the dough looks uneven at this stage. The resting process will develop the structure.
Step 4: First Rise
Cover the bowl with a kitchen towel or plastic wrap.
Place it in a warm area and allow the dough to rise for 1½ to 2 hours.
The dough should double in size.
The rising time depends on the temperature of your kitchen. A warmer environment speeds up fermentation, while a cooler room may require more time.
For deeper flavor, you can place the dough in the refrigerator overnight and bake it the next day.
Step 5: Shape the Bread
Once the dough has risen, lightly flour your work surface.
Gently remove the dough from the bowl.
Avoid pressing out all the air because those air pockets create a lighter texture.
Shape the dough into a round loaf or place it into a greased loaf pan.
For a rustic artisan look:
- Fold the edges toward the center.
- Turn the dough over.
- Shape it into a smooth round ball.
Place the shaped dough onto parchment paper.
Step 6: Second Rise
Cover the shaped dough loosely.
Allow it to rise again for 30–45 minutes.
The dough should become slightly puffy.
During this time, preheat your oven to:
425°F (220°C)
If using a Dutch oven, place it inside the oven while preheating.
Step 7: Add Seed Topping
Brush the surface of the dough lightly with milk or egg wash.
This helps the seeds stick and creates a beautiful golden crust.
Sprinkle the reserved mixed seeds evenly over the top.
You can gently press them into the dough so they stay attached after baking.
Using a sharp knife, make a shallow cut across the top of the loaf. This allows steam to escape and helps the bread expand properly.
Step 8: Bake the Bread
Dutch Oven Method
Place the dough carefully into the hot Dutch oven.
Cover with the lid.
Bake for:
- 25 minutes covered
- 15–20 minutes uncovered
The bread should have a deep golden crust.
Loaf Pan Method
Place the loaf pan in the oven.
Bake for 35–45 minutes until the top is golden and the bread sounds hollow when tapped.
The internal temperature should be around 190–200°F (88–93°C).
Step 9: Cool Before Slicing
Remove the bread from the oven.
Transfer it to a cooling rack.
Allow it to cool completely for at least 1 hour before slicing.
Although warm bread smells tempting, cutting too soon can make the inside gummy because the steam has not finished escaping.
Once cooled, use a sharp serrated knife to slice the loaf.
Tips for Perfect Seeded Bread
Use Quality Flour
Bread flour creates a stronger structure and chewier texture. Whole wheat flour adds flavor and nutrition.
Do Not Add Too Much Flour
Sticky dough creates a softer interior. Adding too much flour can make the bread dry.
Allow Enough Rising Time
Good bread flavor comes from proper fermentation. Do not rush the rising process.
Use Fresh Yeast
Old yeast may not rise properly and can result in a dense loaf.
Store Seeds Properly
Seeds contain natural oils and should be stored in airtight containers to maintain freshness.
Delicious Variations
Multigrain Seed Bread
Add rolled oats, rye flour, and additional grains for a hearty breakfast loaf.
Garlic Herb Seed Bread
Add:
- Garlic powder
- Rosemary
- Thyme
- Oregano
for a savory version.
Cheese Seed Bread
Add shredded cheddar, Parmesan, or mozzarella into the dough.
Sweet Seed Bread
Add:
- Cinnamon
- Raisins
- Dried cranberries
- Honey
for a breakfast-style loaf.
Nutty Bread
Add chopped walnuts, almonds, or pecans along with the seeds.
Serving Suggestions
This seeded artisan bread is delicious served in many ways:
Breakfast
- Toast with butter
- Peanut butter and honey
- Avocado toast
- Scrambled eggs
Lunch
- Sandwiches
- Grilled cheese
- Chicken salad sandwiches
Dinner
Serve alongside:
- Vegetable soup
- Chicken soup
- Stews
- Pasta dishes
- Salads
The crunchy crust and soft interior make it an excellent all-purpose bread.
Storage Instructions
Store cooled bread in a bread bag or airtight container at room temperature for up to 3 days.
For longer storage:
- Slice the bread.
- Wrap individual slices.
- Freeze for up to 3 months.
Toast frozen slices directly when needed.
Approximate Nutrition (Per Slice)
Makes approximately 12 slices.
- Calories: 190
- Protein: 7 g
- Carbohydrates: 32 g
- Fat: 5 g
- Fiber: 4 g
- Sugar: 2 g
- Sodium: 320 mg
(Nutrition values vary depending on flour and seed combinations.)
Final Thoughts
Homemade seeded artisan bread is a rewarding recipe that transforms simple ingredients into a beautiful, flavorful loaf. The crisp golden crust, soft interior, and crunchy seed topping make it a perfect addition to any meal. While the process requires patience during rising and cooling, the result is worth every moment.
This bread captures the comfort of traditional baking while remaining simple enough for home cooks. Whether enjoyed fresh from the oven, toasted with butter, or used to create delicious sandwiches, this seeded bread is a wholesome homemade favorite that you will want to bake again and again.
