





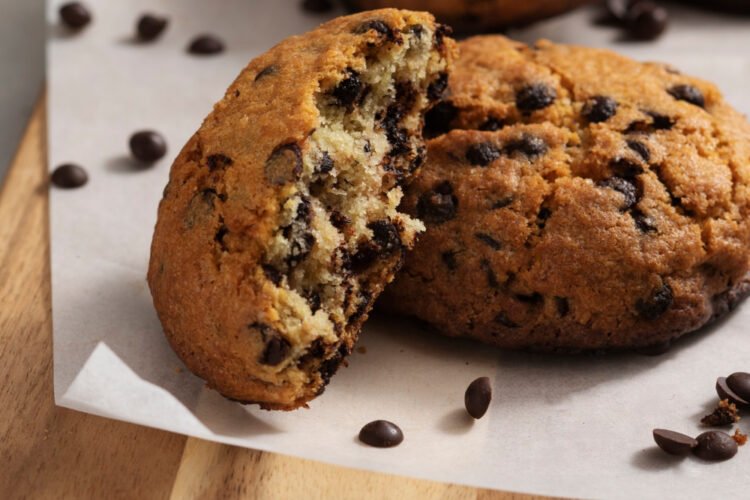
Gluten Free Chocolate Chip Brownie Cookies Few homemade treats satisfy chocolate lovers quite like brownie cookies. They combine the rich, fudgy center of a brownie with the crisp edges and convenient shape of a cookie. When made gluten-free, these cookies can be every bit as indulgent as the traditional version, provided the ingredients are balanced correctly. The key lies in using a quality gluten-free flour blend, enough chocolate for depth of flavor, and careful mixing to create the signature crackly top.
This recipe produces cookies with crisp, shiny exteriors, chewy edges, and soft, brownie-like centers studded with pools of melted chocolate chips. They are perfect for holiday baking, afternoon coffee, lunchboxes, or simply satisfying a chocolate craving.
Why These Cookies Work
Unlike ordinary chocolate chip cookies, brownie cookies contain a higher proportion of chocolate and cocoa powder. Melted chocolate gives richness, while cocoa intensifies the flavor. Eggs provide structure and contribute to the glossy, crackled top. A small amount of gluten-free flour keeps the cookies tender without becoming cakey.
Using both brown sugar and granulated sugar helps achieve the ideal texture. Brown sugar adds moisture and chewiness, while white sugar encourages crisp edges and the signature shiny crust.
Adding chocolate chips at the end creates pockets of melted chocolate throughout each cookie, making every bite extra decadent.
Ingredients
Makes approximately 18–22 cookies.
Dry Ingredients
- 1 cup (140 g) gluten-free all-purpose flour blend (with xanthan gum)
- ¼ cup (25 g) unsweetened cocoa powder
- 1 teaspoon baking powder
- ¼ teaspoon baking soda
- ½ teaspoon fine salt
Wet Ingredients
- 170 g (6 oz) dark chocolate (60–70% cocoa), chopped
- ½ cup (115 g) unsalted butter
- ¾ cup (150 g) granulated sugar
- ½ cup (100 g) light brown sugar, packed
- 2 large eggs, room temperature
- 1 teaspoon vanilla extract
Mix-Ins
- 1 cup (170 g) semi-sweet gluten-free chocolate chips
- Optional: ½ cup chopped walnuts or pecans
- Optional: flaky sea salt for sprinkling
Equipment
- Two mixing bowls
- Saucepan or microwave-safe bowl
- Electric mixer or whisk
- Rubber spatula
- Baking trays
- Parchment paper
- Cookie scoop or tablespoon
- Cooling rack
Step 1: Prepare the Oven
Preheat the oven to 350°F (175°C).
Line two baking trays with parchment paper.
Using parchment prevents sticking and helps the cookies bake evenly.
Step 2: Mix the Dry Ingredients
In a medium bowl, whisk together:
- gluten-free flour
- cocoa powder
- baking powder
- baking soda
- salt
Whisking distributes the leavening evenly and breaks up any cocoa lumps.
Set aside.
Step 3: Melt the Chocolate
Place the chopped dark chocolate and butter in a heatproof bowl.
Melt gently over simmering water or microwave in 20-second intervals, stirring after each interval until smooth.
Allow the mixture to cool for about five minutes.
It should be warm but not hot enough to cook the eggs.
Step 4: Beat the Eggs and Sugar
In a large bowl, beat together:
- granulated sugar
- brown sugar
- eggs
Mix for about 3–5 minutes until the mixture becomes pale, thick, and slightly fluffy.
This step is important because it incorporates air, which helps create the shiny, crackled tops that make brownie cookies distinctive.
Mix in the vanilla extract.
Step 5: Combine the Chocolate and Egg Mixtures
Slowly pour the melted chocolate mixture into the whipped eggs while stirring continuously.
Mix until completely smooth and glossy.
The batter should look thick and silky.
Step 6: Add the Dry Ingredients
Gradually fold the flour mixture into the chocolate mixture using a rubber spatula.
Mix only until no streaks of flour remain.
Overmixing can make the cookies denser than desired.
Step 7: Fold in the Chocolate Chips
Add the chocolate chips and, if using, the chopped nuts.
Fold gently until evenly distributed.
The dough will be soft and resemble thick brownie batter.
If it feels very loose, chill it for 15–20 minutes to make scooping easier.
Step 8: Scoop the Cookies
Using a cookie scoop or tablespoon, place portions of dough onto the prepared baking trays.
Leave about 2 inches (5 cm) between each cookie because they spread during baking.
For bakery-style cookies, make the dough portions slightly larger.
If desired, press a few extra chocolate chips onto the tops before baking for a more attractive finish.
Step 9: Bake
Bake for 10–12 minutes.
The cookies are done when:
- the tops are shiny and crackled
- the edges are set
- the centers still appear slightly soft
Avoid overbaking, as the cookies continue to firm up while cooling.
Step 10: Cool
Allow the cookies to rest on the baking tray for 5 minutes.
Transfer them to a wire rack to cool completely.
As they cool, the centers become wonderfully fudgy while the edges stay crisp
Flavor Variations
Double Chocolate
Replace half the semi-sweet chocolate chips with white chocolate chips for a striking contrast in flavor and appearance.
Triple Chocolate
Use a mix of dark, milk, and white chocolate chips for extra richness and visual appeal.
Espresso Brownie Cookies
Add 1 teaspoon of instant espresso powder to the dry ingredients. Coffee enhances the chocolate flavor without making the cookies taste like coffee.
Peanut Butter Swirl
Drop small spoonfuls of creamy peanut butter onto the scooped dough and swirl lightly with a toothpick before baking.
Mint Chocolate
Mix in ½ teaspoon of peppermint extract and use dark chocolate chips for a refreshing twist.
Salted Caramel
Fold in caramel baking chips and sprinkle the tops with flaky sea salt immediately after baking.
Tips for Perfect Brownie Cookies
- Use room-temperature eggs so they whip more easily and blend smoothly.
- Choose high-quality chocolate for the richest flavor.
- Measure gluten-free flour accurately by spooning it into the measuring cup and leveling it off.
- Don’t overmix once the flour is added, as this can make the cookies tougher.
- Chill the dough briefly if it is too soft to scoop neatly.
- Bake one tray at a time for the most even results.
- Remove the cookies from the oven while the centers still look slightly underdone—they will finish setting as they cool.
- Sprinkle a pinch of flaky sea salt on warm cookies to enhance the chocolate flavor.
Storage
Store cooled cookies in an airtight container at room temperature for up to 5 days.
To keep them extra soft, place a small slice of bread in the container; the cookies absorb moisture from the bread without becoming soggy.
For longer storage, freeze the baked cookies in a freezer-safe container for up to 3 months. Thaw at room temperature or warm briefly in a low oven before serving.
You can also freeze portions of the unbaked dough. Scoop the dough onto a tray, freeze until firm, then transfer the frozen dough balls to a freezer bag. Bake directly from frozen, adding 1–2 minutes to the baking time.
Serving Suggestions
These gluten-free chocolate chip brownie cookies are delicious on their own, but they also pair beautifully with a glass of cold milk, hot coffee, tea, or hot chocolate. For a decadent dessert, sandwich vanilla ice cream between two cookies, drizzle with warm chocolate sauce, and roll the edges in mini chocolate chips. They also make a wonderful addition to holiday cookie boxes, bake sales, and edible gift baskets.
Final Thoughts
Gluten-free baking doesn’t mean compromising on flavor or texture, and these Chocolate Chip Brownie Cookies are proof. They deliver everything people love about brownies—rich chocolate flavor, chewy centers, and shiny crackled tops—in a convenient handheld cookie. With a simple ingredient list and straightforward method, they’re suitable for beginner and experienced bakers alike. Whether enjoyed fresh from the oven, packed for lunch, or shared with friends and family, these cookies are sure to become a favorite recipe that no one will guess is gluten-free. Their irresistible combination of crisp edges, fudgy interiors, and melty chocolate chips makes them a dessert you’
