



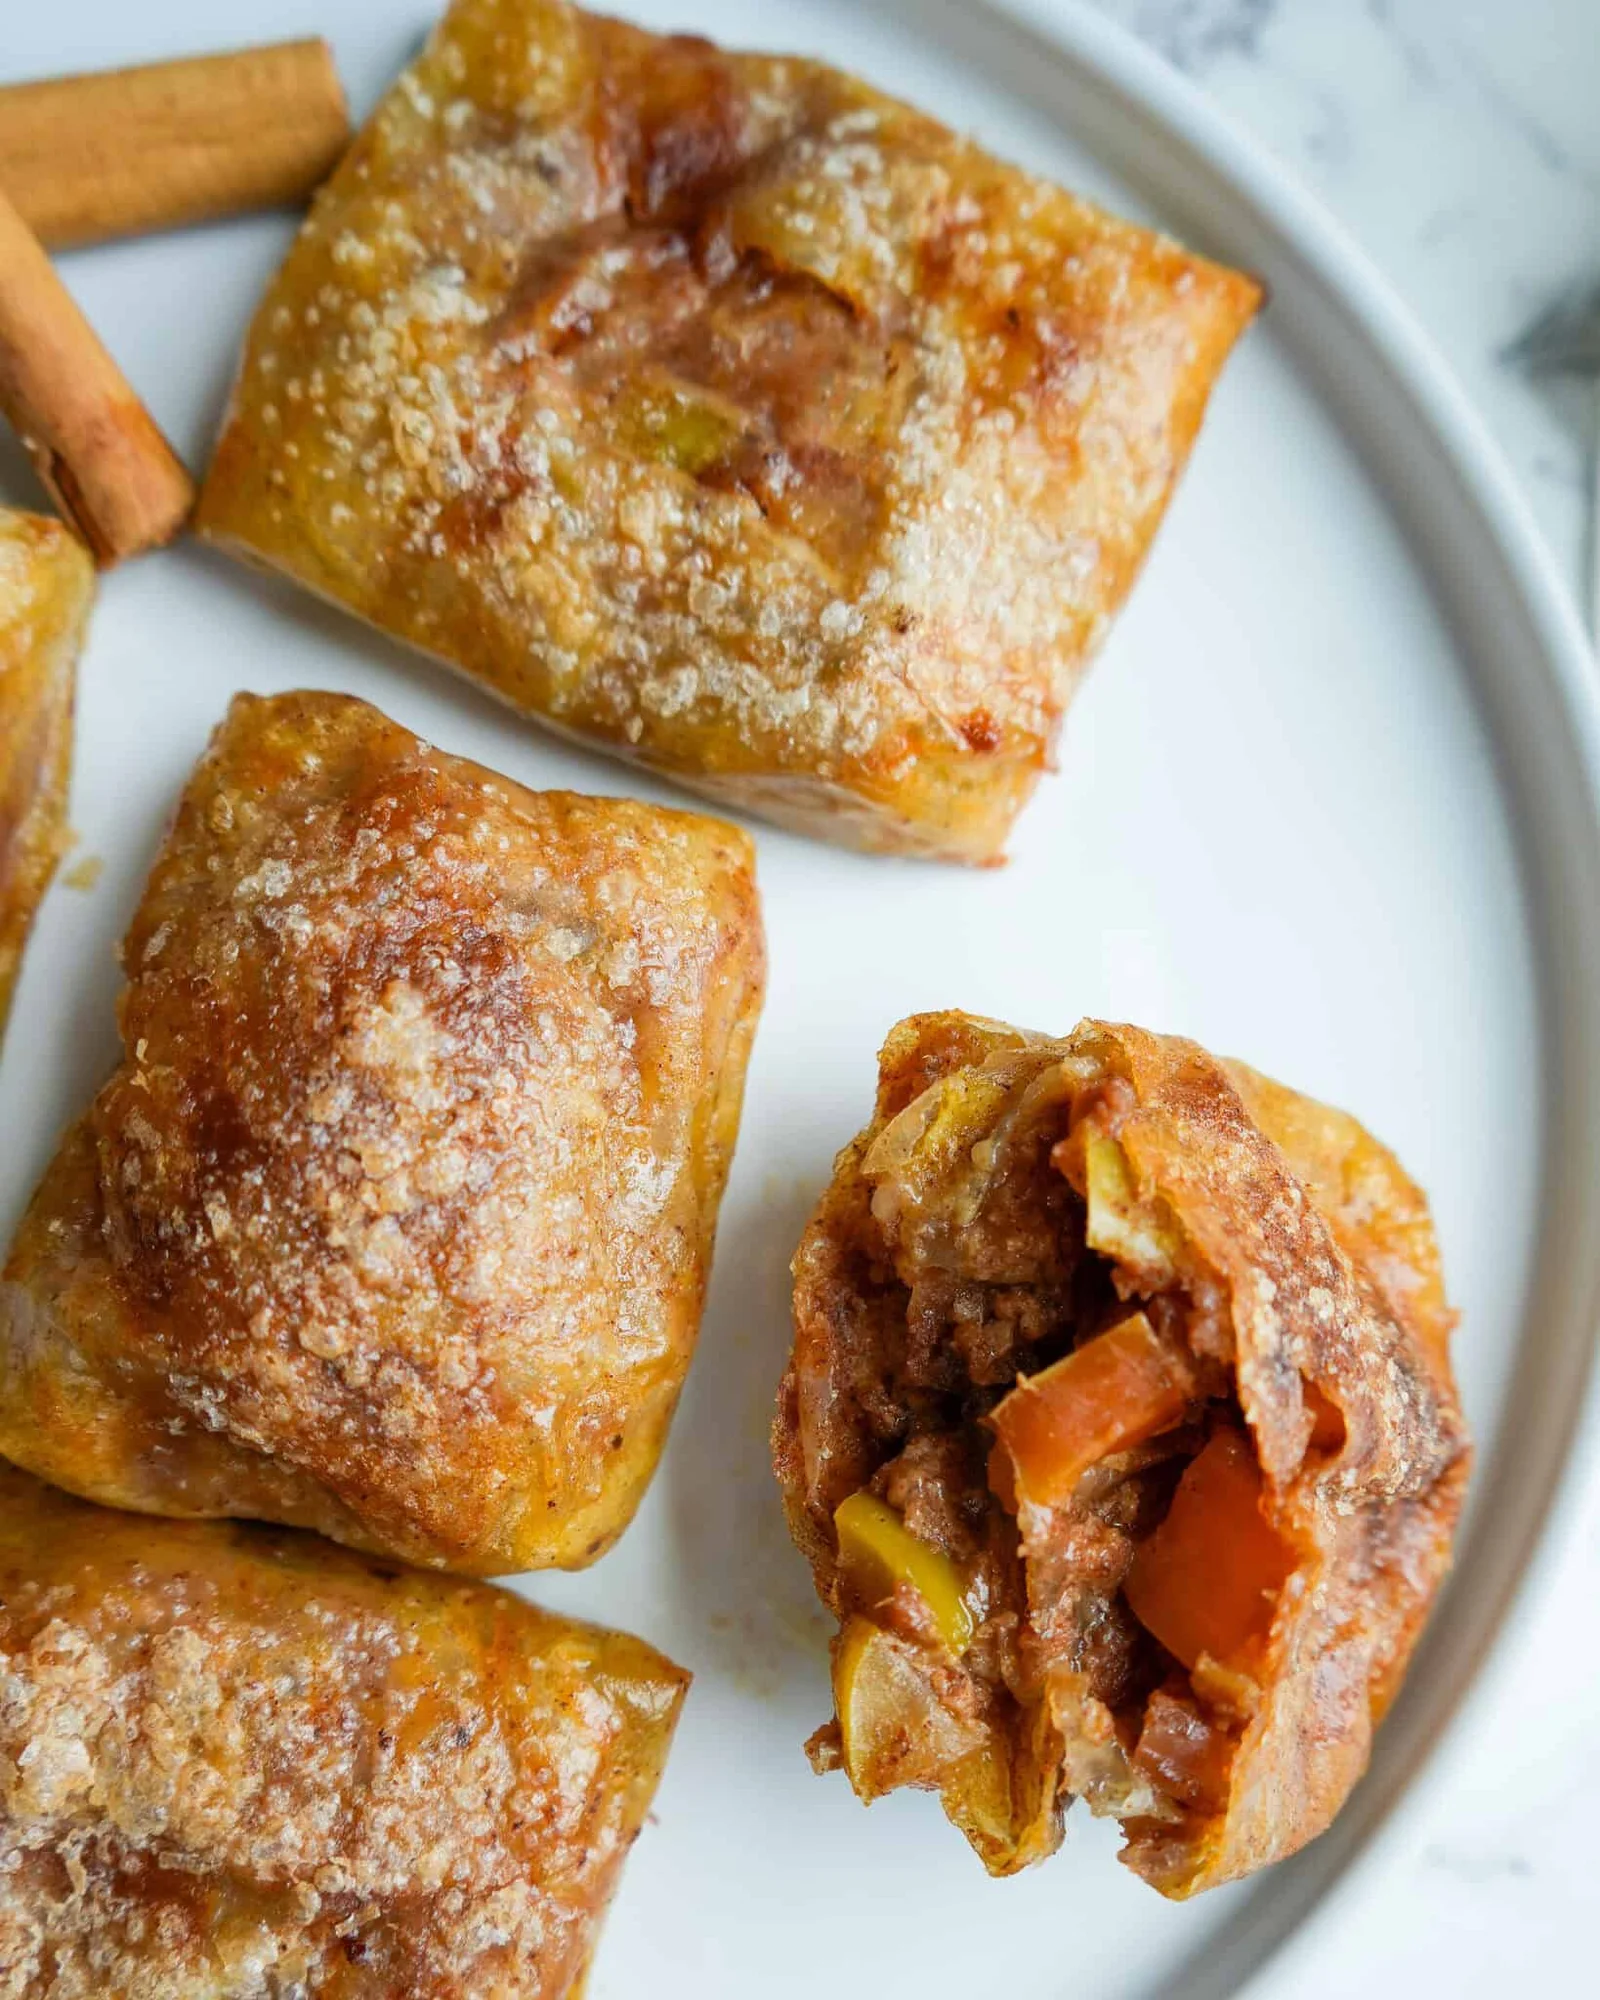
Gluten-Free Crispy Rice Paper Pastry: If you’ve ever missed the flaky crunch of traditional puff pastry after switching to a gluten-free diet, there’s a clever kitchen trick worth trying: using rice paper wrappers dipped in beaten egg to create surprisingly crisp, light, layered pastries. Rice paper is naturally gluten-free (always check the package to confirm there is no cross-contamination), inexpensive, and widely available. When briefly softened and coated with egg, the sheets become flexible enough to layer and fold. As they bake, they transform into an incredibly crisp shell with delicate blistering and a satisfying crunch.
This technique has become popular because it is simple, requires very few ingredients, and can be adapted for sweet or savory fillings. While it does not perfectly imitate the buttery layers of puff pastry, it creates a wonderfully crisp exterior that works beautifully for turnovers, hand pies, rolls, and dessert parcels.
Why This Trick Works
Rice paper is made primarily from rice flour, tapioca starch, water, and salt. Dry sheets are hard and brittle, but after a quick dip in water they become soft and flexible. Adding beaten egg coats the softened sheets with protein and fat. During baking, the egg firms up while the rice paper dries, producing a crispy, golden crust.
Layering two or three sheets together makes the pastry sturdier and gives a more substantial bite. Brushing the outside with butter or oil helps promote even browning and richer flavor.
The result is somewhere between filo pastry and a crispy cracker—a unique texture that works exceptionally well with creamy fillings.
Ingredients
For the pastry
- 10 rice paper wrappers (about 22 cm / 8½ inches)
- 2 large eggs
- 2 tablespoons milk (optional, for easier coating)
- 2 tablespoons melted butter or olive oil
- Pinch of salt
Sweet Filling Option
- 250 g cream cheese
- 2 tablespoons sugar
- 1 teaspoon vanilla extract
- ½ cup fresh blueberries
- Lemon zest (optional)
Savory Filling Option
- 1 cup cooked spinach, squeezed dry
- 150 g feta cheese
- ½ teaspoon garlic powder
- Black pepper
- Fresh herbs (parsley or dill)
Equipment
- Baking tray
- Baking paper
- Pastry brush
- Bowl of warm water
- Mixing bowl
- Fork or whisk
Step 1: Prepare the Filling
Before working with the rice paper, prepare your filling completely.
For the sweet version, mix the cream cheese, sugar, vanilla, and lemon zest until smooth. Fold in the blueberries gently.
For the savory version, crumble the feta into the spinach. Add herbs, garlic powder, and pepper. Mix until evenly combined.
The filling should be fairly thick. If it contains excess moisture, the pastry may soften during baking.
Step 2: Prepare the Egg Mixture
Beat the eggs in a shallow bowl.
Add:
- pinch of salt
- milk (optional)
Whisk until completely smooth.
The egg wash gives the rice paper flexibility and helps create a beautifully golden finish.
Step 3: Soften the Rice Paper
Fill a large plate or shallow pan with warm (not hot) water.
Dip one rice paper sheet for about 5–8 seconds.
Do not soak it until floppy.
It should still feel slightly firm because it continues softening after you remove it.
Lay it flat on a clean towel or cutting board.
Step 4: Dip in Egg
Using a pastry brush, coat both sides lightly with beaten egg.
Alternatively, briefly dip the softened wrapper directly into the egg mixture.
Repeat with another rice paper sheet.
Layer the second sheet directly on top of the first.
For extra strength, use a third sheet.
Three layers create a pastry that is easier to handle and produces a satisfying crunch.
Step 5: Add the Filling
Place about two tablespoons of filling in the center.
Avoid overfilling.
Leave approximately 5 cm (2 inches) of border around the edges.
Step 6: Fold
You can fold the pastry in several ways:
- Triangle turnover
- Rectangle parcel
- Spring-roll shape
- Small square pillow
Press gently to seal.
Because the egg is sticky, the layers usually adhere without additional sealing
Step 7: Butter the Outside
Brush each pastry generously with:
- melted butter
or
- olive oil
This encourages browning and adds richness.
Step 8: Bake
Preheat the oven to 200°C (400°F).
Bake for 20–25 minutes, turning once halfway through if needed.
The pastry is ready when:
- deeply golden
- blistered
- crisp
- firm to the touch
If using an air fryer, cook at 190°C (375°F) for about 12–15 minutes, checking a few minutes early as air fryers vary.
Step 9: Cool Slightly
Allow the pastries to rest for 5–10 minutes before serving.
The crust becomes even crispier as steam escapes.
Flavor Variations
This method is versatile and works with many fillings:
Apple Cinnamon
Combine diced apples with cinnamon, brown sugar, and a teaspoon of cornstarch. Bake until the apples are tender and the pastry is crisp.
Chocolate Banana
Spread a little chocolate-hazelnut spread inside, add banana slices, and fold into triangles. Dust with icing sugar after baking.
Pizza Pockets
Fill with mozzarella, tomato sauce, pepperoni (or vegetables), and oregano for a crispy handheld snack.
Chicken and Mushroom
Mix cooked chicken, sautéed mushrooms, cream cheese, and thyme for a hearty savory version.
Berry Cheesecake
Use sweetened cream cheese with raspberries or strawberries for a dessert that resembles a miniature cheesecake wrapped in a crisp shell.
Tips for Success
- Do not oversoak the rice paper; it should be pliable, not mushy.
- Layering two or three sheets prevents tearing and creates a more satisfying texture.
- Keep fillings relatively dry to maintain crispness.
- Brush the exterior with butter or oil for better color and flavor.
- Avoid overcrowding the baking tray so hot air can circulate around each pastry.
- Serve soon after baking for the best crunch.
Storage
These pastries are at their crispiest when freshly baked.
If you have leftovers:
- Refrigerate in an airtight container for up to 3 days.
- Reheat in an oven or air fryer until crisp again.
- Avoid microwaving, as it softens the crust.
You can also freeze assembled, unbaked pastries for up to 2 months. Bake directly from frozen, adding about 5–8 minutes to the baking time.
Serving Ideas
Sweet pastries pair well with fresh fruit, whipped cream, vanilla yogurt, or a dusting of powdered sugar. Savory versions are delicious alongside a green salad, tomato soup, or a yogurt-herb dip. For entertaining, make smaller parcels with different fillings so guests can sample a variety of flavors.
Final Thoughts
The rice paper and egg technique is a clever alternative for anyone seeking a gluten-free pastry option without the complexity of making gluten-free puff pastry from scratch. Although it doesn’t recreate the buttery laminated layers of classic puff pastry, it offers its own appeal: a crisp, golden shell that’s light, crunchy, and adaptable to countless fillings. Whether you’re making breakfast pastries, savory appetizers, or quick desserts, this method is simple enough for beginners yet versatile enough to become a regular part of your gluten-free cooking repertoire. With just a handful of pantry staples and a little practice, you can produce pastries that are crisp o
